Creme Brûlée Cookies – Decadent Custard Meets Cookie Crunch
Creme Brûlée Cookies are more than just a dessert; they are an experience. Imagine the satisfying crack of caramelized sugar giving way to a rich, creamy custard, all captured in a delightful, portable cookie form. It’s no wonder we all adore the classic crème brûlée – that perfect balance of textures and the sweet, slightly bitter notes of burnt sugar is simply irresistible. But what if you could capture that magic in a treat you can share (or hoard!) without the fuss of individual ramekins and a blowtorch? That’s where these incredible Creme Brûlée Cookies come in. We’ve taken the beloved flavors and signature texture of this iconic French dessert and ingeniously transformed them into a chewy, buttery cookie with that signature crisp sugar topping. Get ready to fall in love all over again with this familiar yet exciting new way to enjoy Creme Brûlée.

Creme Brûlée Cookies
Get ready to experience the best of both worlds with these incredible Creme Brûlée Cookies. We’re taking the rich, creamy, decadent custard filling of classic crème brûlée and transforming it into a delightful cookie experience. Imagine a perfectly crisp cookie shell giving way to a smooth, vanilla-kissed custard, all topped with that signature caramelized sugar crunch. It sounds ambitious, but I promise, it’s surprisingly approachable and absolutely worth the effort. These cookies are perfect for impressing guests, a special occasion, or simply treating yourself to something truly extraordinary. Let’s dive in and create some magic!
Ingredients:
- 2 1/4 cups (540 ml) whole milk
- 6 egg yolks
- 1 cup + 2 tbsp (225 g) granulated white sugar
- 1/8 tsp salt
- 1 1/2 tbsp vanilla bean paste
- 3 1/2 tbsp (28 g) cornstarch
- 3 tbsp (42 g) unsalted butter, cut in cubes
- 2 1/2 cups (313 g) all-purpose flour, spooned and leveled
- 1/2 tsp baking powder
- 1/2 tsp salt
- 1 1/4 cup (250 g) granulated white sugar
- 1 cup (224 g) unsalted butter, softened
- 1 egg
- 1 tbsp vanilla bean paste
- 1/2 cup (100 g) granulated white sugar (for rolling the dough in)
The Creamy Custard Filling
First, we need to make our glorious crème brûlée filling. This is the heart and soul of our cookie, so let’s give it the attention it deserves.
1. In a medium saucepan, gently warm the whole milk over medium-low heat. You want it to be steaming, but not boiling. Keep an eye on it to prevent scorching the bottom. While the milk is warming, in a separate bowl, whisk together the 6 egg yolks, 1 cup + 2 tbsp of granulated white sugar, and the 1/8 tsp salt. Whisk vigorously until the mixture is pale yellow and slightly thickened. This process is crucial for creating a smooth custard.
2. In a small bowl, whisk the cornstarch with about 1/4 cup of the warmed milk until it forms a smooth paste. This is called “tempering” the cornstarch and it helps prevent lumps in your custard. Once the milk is steaming (again, no boiling!), gradually pour about half of the warm milk into the egg yolk mixture, whisking constantly. This tempering step ensures the eggs don’t scramble when you add them to the hot milk.
3. Now, pour the tempered egg yolk and milk mixture back into the saucepan with the remaining warm milk. Cook over medium heat, stirring constantly with a whisk or a silicone spatula, scraping the bottom and sides of the pan. You’ll feel the mixture start to thicken. Continue to cook and stir until the custard is thick enough to coat the back of a spoon, and you can draw a line through it with your finger. This usually takes about 5-8 minutes. Be patient and don’t rush this step!
4. Once thickened, remove the saucepan from the heat. Stir in the 1 1/2 tbsp of vanilla bean paste until fully incorporated. Add the cubed unsalted butter, one cube at a time, stirring until each piece is melted and incorporated before adding the next. The butter adds richness and a beautiful sheen to the custard. Pour the custard into a clean bowl. To prevent a skin from forming on the surface as it cools, press a piece of plastic wrap directly onto the surface of the custard. Let it cool at room temperature for about 30 minutes, then refrigerate for at least 2 hours, or until completely chilled and firm.
Crafting the Cookie Dough
Now for the cookie part! We want a sturdy, slightly crisp cookie that will hold up to the rich filling.
5. In a large bowl, cream together the softened 1 cup of unsalted butter and the 1 1/4 cup of granulated white sugar. Beat with an electric mixer on medium speed until light and fluffy. This process incorporates air, which will contribute to the cookie’s texture. Add the egg and the 1 tbsp of vanilla bean paste, and beat until well combined and smooth.
6. In a separate medium bowl, whisk together the 2 1/2 cups of all-purpose flour, the baking powder, and the 1/2 tsp of salt. Gradually add the dry ingredients to the wet ingredients in the butter mixture, mixing on low speed until just combined. Be careful not to overmix. The dough will be soft.
Assembly and Baking
This is where the magic really comes together!
7. Once the custard is thoroughly chilled and firm, it’s time to assemble. You can either pipe the custard into the cookies or spoon it in. A simple way is to cut a small circle out of the center of each cookie dough ball after baking, then fill the cavity. However, for a true crème brûlée experience, we’ll incorporate the custard *before* baking.
Take about half of the cookie dough and flatten it slightly in your hand. Place a generous spoonful of the chilled custard in the center. Then, take the remaining cookie dough, flatten it, and carefully enclose the custard, sealing the edges to create a little pocket. Gently roll the dough ball in the 1/2 cup of granulated white sugar set aside for rolling. The sugar will create a beautiful, slightly crunchy coating.
8. Place the coated dough balls onto a baking sheet lined with parchment paper, leaving about 2 inches between them. Bake in a preheated oven at 350°F (175°C) for 12-15 minutes, or until the edges are golden brown and the centers are just set. Don’t overbake them; we want a slightly chewy center.
9. After baking, let the cookies cool on the baking sheet for a few minutes before transferring them to a wire rack to cool completely. This is important for them to firm up.
The Grand Finale: Caramelized Tops
This is the quintessential crème brûlée step that makes these cookies truly spectacular.
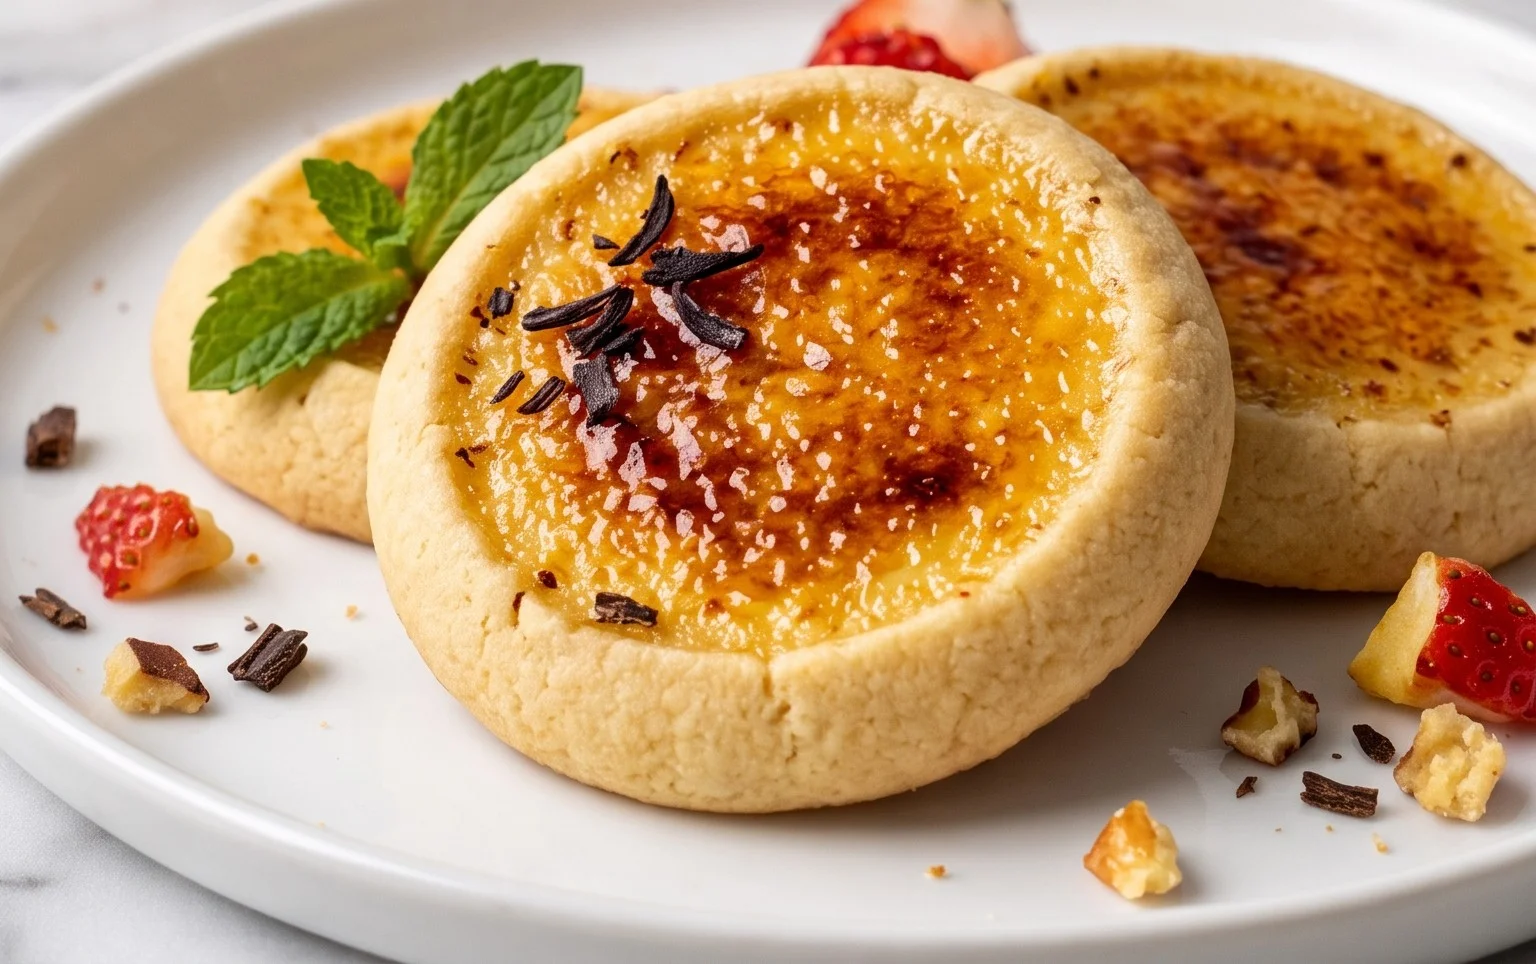
10. Once the cookies have cooled completely, it’s time for the brûlée. Sprinkle a thin, even layer of granulated white sugar over the top of each cookie. You can use a spoon for this, or even a fine-mesh sieve for a more uniform coating. Now, carefully use a kitchen torch to caramelize the sugar. Move the torch constantly in a circular motion over the sugar until it melts, bubbles, and turns a beautiful amber-caramel color. Be careful not to burn it! If you don’t have a kitchen torch, you can carefully place the cookies under a broiler for just a minute or two, watching them extremely closely, until the sugar is caramelized.
These Creme Brûlée Cookies are a labor of love, but the payoff is immense. The contrast between the crisp cookie, the creamy custard, and the crackly caramelized sugar is simply divine. Enjoy every delightful bite!
Conclusion:
I hope you’ve enjoyed this journey into creating your very own Creme Brûlée Cookies! This recipe truly offers the best of both worlds: the rich, creamy flavor profile of classic crème brûlée married with the delightful chew and crisp edges of a perfectly baked cookie. The magic lies in that satisfying crackle of caramelized sugar atop a tender cookie base, a testament to a truly inspired dessert mashup. These cookies are not only a treat for your taste buds but a beautiful addition to any dessert table, guaranteed to impress your friends and family with their elegance and unique texture. I highly encourage you to give them a try; they are surprisingly straightforward to make and the results are incredibly rewarding. Imagine them served warm with a dusting of powdered sugar or a dollop of fresh whipped cream – pure bliss!
For serving, consider them alongside a steaming cup of coffee or a delicate herbal tea. They also make a wonderful concluding note to a special meal. For variations, feel free to experiment with adding a touch of citrus zest (like orange or lemon) to the cookie dough, or even a hint of liqueur extract such as Grand Marnier Extract for an adult twist. Another fun idea is to sprinkle a few edible flowers or finely chopped nuts on top before the final caramelization for added visual appeal and texture. Don’t be afraid to get creative and make these Creme Brûlée Cookies your own!
Frequently Asked Questions:
Can I make the caramel topping ahead of time?
While you can prepare the cookie dough ahead of time and bake them, the signature caramelized sugar topping is best done right before serving. This ensures it has that perfect, crisp crackle. If you try to caramelize them too far in advance, the sugar can absorb moisture from the air and become soft and sticky.
What’s the best way to store leftover Creme Brûlée Cookies?
Once the caramel topping has set, store your Creme Brûlée Cookies in an airtight container at room temperature for up to 2-3 days. Avoid refrigerating them, as this can make the caramel topping soft. If you have a lot of them, you can also freeze the un-caramelized cookies and then caramelize them as needed.
My sugar topping isn’t getting hard. What am I doing wrong?
Several factors can contribute to this. Ensure you are using granulated sugar – brown sugar won’t caramelize properly. Your torch might not be hot enough, or you might be holding it too far away. Also, be sure you’re not using too thick a layer of sugar; a thin, even coating works best. Sometimes, a slightly underbaked cookie can also lead to moisture issues that prevent hardening.
Creme Brûlée Cookies
Delightful cookies with a creamy creme brûlée filling and a crisp, caramelized sugar topping.
Ingredients
-
2 1/4 cups (540 ml) whole milk
-
6 egg yolks
-
1 cup + 2 tbsp (225 g) granulated white sugar
-
1/8 tsp salt
-
1 1/2 tbsp vanilla bean paste
-
3 1/2 tbsp (28 g) cornstarch
-
3 tbsp (42 g) unsalted butter, cut in cubes
-
2 1/2 cups (313 g) all-purpose flour, spooned and leveled
-
1/2 tsp baking powder
-
1/2 tsp salt
-
1 1/4 cup (250 g) granulated white sugar
-
1 cup (224 g) unsalted butter, softened
-
1 egg
-
1 tbsp vanilla bean paste
-
1/2 cup (100 g) granulated white sugar (for rolling the dough in)
Instructions
-
Step 1
For the custard filling: In a medium saucepan, heat the milk and 1/8 tsp salt over medium heat until steaming but not boiling. In a separate bowl, whisk together the egg yolks, 1 cup + 2 tbsp sugar, and cornstarch until smooth. -
Step 2
Temper the egg yolks: Slowly whisk about half of the hot milk into the egg yolk mixture. Pour the tempered egg mixture back into the saucepan with the remaining milk. Cook over medium-low heat, whisking constantly, until thickened, about 5-7 minutes. Stir in the 3 tbsp butter and 1 1/2 tbsp vanilla bean paste. Transfer to a bowl, cover with plastic wrap directly on the surface, and refrigerate until completely chilled. -
Step 3
For the cookie dough: In a large bowl, cream together the 1 1/4 cup softened butter and 1 1/4 cup sugar until light and fluffy. Beat in the egg and 1 tbsp vanilla bean paste. -
Step 4
In a separate bowl, whisk together the flour, baking powder, and 1/2 tsp salt. Gradually add the dry ingredients to the wet ingredients, mixing until just combined. -
Step 5
Chill the dough for at least 1 hour. Roll the chilled dough into 1-inch balls and then roll each ball in the 1/2 cup granulated sugar set aside for rolling. Place on a parchment-lined baking sheet. -
Step 6
Bake at 375°F (190°C) for 10-12 minutes, or until lightly golden around the edges. Let cookies cool on the baking sheet for a few minutes before transferring to a wire rack to cool completely. -
Step 7
Once cookies are cooled, carefully slice each cookie in half horizontally. Spread a generous amount of the chilled custard filling onto the bottom half of each cookie and sandwich with the top half.
Important Information
Nutrition Facts (Per Serving)
It is important to consider this information as approximate and not to use it as definitive health advice.
Allergy Information
Please check ingredients for potential allergens and consult a health professional if in doubt.


